![]()
Chapter 3
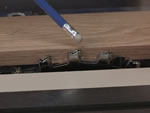
Cutting the First
Finger Socket
Chapter 5
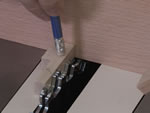
Final Set-up of the Jig
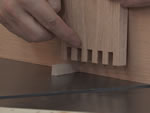
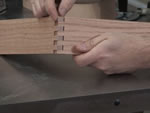
Chapter 7
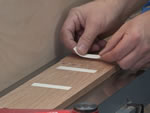
Cutting the Front and Back Panels
Chapter 9
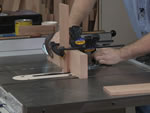
Trimming Excess Wood
Off Bottom of Panels
Chapter 11
Hand Planing the
Finger Joints Flush
Chapter 13
Making a Simple Lift-Off Lid
Thoughts on
Woodworking
Part 2
Machine Methods Save Time
Instructional Woodworking
DVDs
Finger Joints on the Table Saw
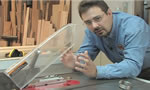
Author: Hendrik Varju

Hendrik Varju / Passion for Wood / August 2016
ISBN: 978-0-9881280-9-5
7 hours, 40 minutes on 4 DVDs
Price: Cdn. $94.95 + applicable taxes
+ shipping and handling
Ontario residents pay 13% hst. Canadian residents outside of Ontario pay hst at their own province’s rate, or 5% gst if in a non-participating province. Residents outside of Canada pay no tax.

To view a clip of this DVD click the play button above.
The above video clip has been reduced in quality for online viewing. The real DVD product has a much higher resolution.
![]()
To download a PDF of this production’s
Table of Contents click here.
This document will make it easier for you to navigate the video.
The Table of Contents is already included inside the DVD case, but you can download a copy here if you’ve misplaced it.
In 2016 Hendrik released two new instructional DVD offerings, bringing the total to 18 titles. “Making Tapered Table Legs” is the second DVD newly released in 2016, but let us first hear about the long awaited production: “Finger Joints on the Table Saw”.
Previous videos have covered machinery and tool skills, wood science, joinery methods, finishing and more. They have also covered how to build drawers and frame and panel doors. But this time Hendrik shows you how to make finger joints on a table saw. Last year Hendrik’s production called “Handcut Dovetails” taught you how to make beautiful dovetails entirely by hand. But you might be longing for a similar joinery method that can be done more quickly and entirely on a machine. So finger joints cut on a table saw offer a beautiful solution, allowing you to build stunning jewellery boxes, humidors, blanket chests or even drawers. This production includes footage spread over more than 7 1/2 hours on 4 disks. As is Hendrik’s usual style, this DVD set is a detailed step-by-step course – not the “usual” DVD fare that may have disappointed you in the past.
The DVD starts by reviewing the equipment you’ll need to make finger joints on the table saw, such as a mitre gauge, dado set, measuring tools and so on. Then, in chapter 2, Hendrik walks you through his planning process so that you can decide on how many fingers and sockets to aim for given the size of the box you’re working on. He goes over the simple math in an effort to ensure your project does not end with a half finger on the far side of the joint.
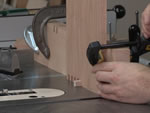
In chapter 3, Hendrik starts you on the process of building the simple finger joint jig you’ll need to make for your table saw. In fact, chapters 3, 4 and 5 take you through the entire process, including making the finger piece and spacer block and how to set up the jig with high precision on your mitre gauge. As always, the details are everything.
Chapter 6 involves a quick set of test cuts to ensure the fingers and sockets will fit together well. Hendrik suggests that off-cuts from your project parts can be used for test cuts prior to committing to the real project. But any accurately milled stock will do for this testing.
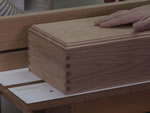
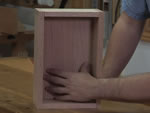
Once the initial testing is done, chapter 7 involves the cutting of the finger joints into the front and back panels of a small box. Chapter 8 cuts the matching joinery in the end panels as well, after which Hendrik tests the joinery for final fit. At this point, the only extra fiddling required is to hand chisel a few bits of stray wood fibres that are sometimes left at the top of the sockets to ensure they don’t interfere with the glue-up later.
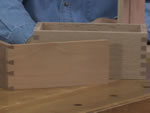
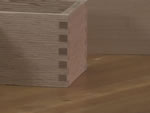
In chapter 9, Hendrik shows you how to safely trim off any excess wood at the bottom of your box parts so that the joint ends on a full finger. He covers safety issues related to this, especially when dealing with relatively small box parts. And he shows you an ingenious method of joining all the parts with the fingers and taping them to a sled so that the excess wood can be trimmed off all the parts at once.
Chapter 10 is a real treat, as it involves the actual glue-up, done in real time, with clamping cauls. Glue-ups are always stressful, so it helps to watch a professional carry out all the necessary tasks in a calm and methodical way. How much glue should you use? How do you apply the glue? How do you prevent glue squeeze-out? All is covered in more detail than you ever imagined.
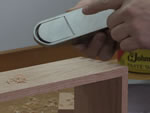
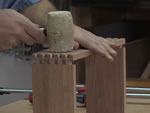
In chapter 11, Hendrik unclamps the glue-up and shows you how to flush off the protruding fingers with a hand plane. While Hendrik has another separate DVD production called “Hand Planing Techniques”, it is nice to watch a refresher on how to hand plane end grain with a low angle block plane. Hendrik even shows you how to fill tiny hairline gaps in your joinery should this happen to you, using a slurry of sawdust and finish created by wet sanding.
As in all of Hendrik’s DVDs, this production is full of techniques he has been using and perfecting for two decades. There is always a wonderful mix of theory, with sketches and full explanations, married with real-time demonstrations you can duplicate in your own workshop. This is the beauty of these multiple disk courses, which give you an absolutely enormous level of detail, but in a “live demonstration” format just not possible in a woodworking book or magazine article.
The most important aspect of this production, as with all the others, is Hendrik’s full demonstrations done in real time. He doesn’t assume prior knowledge, so even a beginner will be able to follow along the journey. Yet he has a knack for covering the basics while simultaneously delving into super fine points an amateur is unlikely to even consider for many years. The incredibly valuable lesson in all this is that Hendrik never just touches on the basics, but goes deeper, giving you a level of understanding of how to dial in accuracy on that last one one-thousandth of an inch. In fine furniture work, accuracy and detail is everything.
Hendrik is known for his detailed “bonus footage” sections in his instructional DVD courses and this DVD is no exception. The bonus footage is called “Building a Simple Box Bottom and Lid”. It is one thing to join box panels with finger joints, but quite another to incorporate a bottom panel and lid into the design. So chapters 12 and 13 go into great detail on these areas as well, totalling nearly 3 hours in length! This is longer than multiple woodworking TV shows put together and longer than most entire DVD productions. So you can be sure that Hendrik goes into every detail so that you can build a box bottom and lid you can be proud of.
Hendrik’s previous production called “Making Frame and Panel Doors” covered hinge mortising and building a hinge mortising jig, so you can use those techniques to also incorporate box lids with hinges. But in this production, Hendrik shows you how to make a simple “lift-off lid”, which is a welcome change from the tediousness of installing butt hinges.
Always remember that Hendrik’s productions are not just “entertainment” like a woodworking television show. These are lengthy step-by-step woodworking courses in a DVD format. Like it says on the front cover of these productions, this is “Private Woodworking Instruction in a Box”TM. In short, “Finger Joints on the Table Saw” is the most complete DVD course of its kind on this subject matter. You’ll appreciate the depth of the information and the subtle details fleshed out at every opportunity.
In this must-have video, you will learn:
- about the equipment you’ll need to cut finger joints on the table saw
- how to plan the finger and socket sizes for any particular project
- how to make a simple finger joint jig for your table saw
- how to make a set of test cuts to align the jig accurately
- how to cut precise finger joints for your project
- how to trim any excess wood from the bottom of the panels so that the joinery ends on a full finger both top and bottom
- how to make clamping cauls to pull the joints tight during glue-up
- how to complete an accurate glue-up in a calm and methodical way, including how to apply the glue and avoid any glue squeeze-out
- how to hand plane the finger joints flush with a low angle block plane
- how to recess a box bottom into a rabbet
- how to include a box bottom in your project that is let into dados during the glue-up
- how to make a simple lift-off lid that doesn’t require hinges
- how to dress up your box with simple routed details
As always, Hendrik’s DVD courses are not like the more common 30 to 60 minute productions you may have found disappointing in the past. Hendrik takes you through every procedure in real time, ensuring that you fully understand the thinking behind every step. Most woodworking videos and television shows just show you the “gist” of each technique, editing away the finer details and problems that might arise. If you truly wish to elevate your finger joint making skills to a professional level, the details are everything.
Normally, Hendrik can only cover all of the high-level details he loves to teach in person, but he has once again succeeded at giving you personal coaching in a DVD format. As a 4-DVD boxed set running for over 7 1/2 hours, “Finger Joints on the Table Saw” will be the leading instructional woodworking DVD in this area. As the trademarked name says, this is “Private Woodworking Instruction in a Box” TM and nothing short of Hendrik’s in-shop seminars and courses even comes close.
To order your DVD today, click below.
Safety Discussion
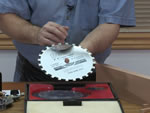
Chapter 1
Required Equipment
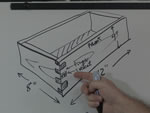
Chapter 2
Planning the Finger Sizes
Chapter 4
Making the Finger Piece
and Spacer Block
Chapter 6
A Quick Set of Test Cuts
Chapter 8
Cutting the End Panels
Chapter 10
Clamping Cauls and Glue-up
Chapter 12
Making a Bottom for a Box
Thoughts on
Woodworking
Part 1
Precision is Everything in Joinery
Thoughts on
Woodworking
Part 3
Glue-ups are Stressful
Safety Discussion
Chapter 4
Making the Finger Piece
and Spacer Block
Chapter 8
Cutting the End Panels
Chapter 12
Making a Bottom for a Box
Thoughts on
Woodworking
Part 3
Glue-ups are Stressful
Chapter 1
Required Equipment
Chapter 5
Final Set-up of the Jig
Chapter 9
Trimming Excess Wood
Off Bottom of Panels
Chapter 13
Making a Simple Lift-Off Lid
Chapter 2
Planning the Finger Sizes
Chapter 6
A Quick Set of Test Cuts
Chapter 10
Clamping Cauls and Glue-up
Thoughts on
Woodworking
Part 1
Precision is Everything in Joinery
Chapter 3
Cutting the First
Finger Socket
Chapter 7
Cutting the Front and Back Panels
Chapter 11
Hand Planing the
Finger Joints Flush
Thoughts on
Woodworking
Part 2
Machine Methods Save Time