![]()

Chapter 3
Cutting Mortises with
a Drill Press
Mortising Attaclunent
Chapter 5
Cleaning Up Mortises
with Chisels
Chapter 7
Cutting Face Cheeks
on the Table Saw
Chapter 9
Alternative Table Saw
Technique for Long Parts
Chapter 11
Final Fitting and Gluing
Chapter 13
Through Wedged
Mortise and Tenon Joints
Thoughts on
Woodworking
Part 2
Accuracy More
Important than Method
Instructional Woodworking
DVDs
Mortise and Tenon Joinery
Author: Hendrik Varju
Hendrik Varju / Passion for Wood / August 2013
ISBN: 978-0-9881280-2-6
10 hours, 58 minutes on 5 DVDs
Price: Cdn. $99.95 + applicable taxes
+ shipping and handling
Ontario residents pay 13% hst. Canadian residents outside of Ontario pay hst at their own province’s rate, or 5% gst if in a non-participating province. Residents outside of Canada pay no tax.

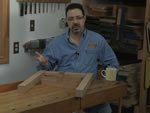
To view a clip of this DVD click the play button above.
The above video clip has been reduced in quality for online viewing. The real DVD product has a much higher resolution.
![]()
To download a PDF of this production’s
Table of Contents click here.
This document will make it easier for you to navigate the video.
The Table of Contents is already included inside the DVD case, but you can download a copy here if you’ve misplaced it.
2013 rounded out Hendrik’s instructional DVD offerings to a dozen titles, releasing two new productions. “Honing and Setting Jointer and Planer Knives” is the second DVD newly released in 2013, but let us first hear about the long awaited joinery production: “Mortise and Tenon Joinery”.
Previous videos have covered some simpler joinery methods such as dowels, rabbets, dados and so on. However, one of the strongest and most time tested joinery techniques in fine woodworking is the mortise and tenon joint. “Mortise and Tenon Joinery” covers several methods Hendrik uses to make these joints, with the footage spread over nearly 11 hours on 5 disks. As is Hendrik’s usual style, this DVD set is a detailed step-by-step course – not the “usual” DVD fare that may have disappointed you in the past.
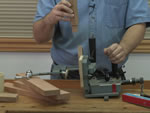
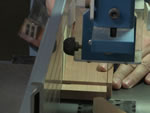
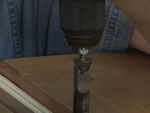
The DVD starts by taking you through some of the methods that can be used to cut mortise and tenon joints and a discussion of why Hendrik has certain favourite methods. The emphasis is on finding methods that are reliable, repeatable, accurate and safe. As with anything in woodworking, there are many possible methods, but often only a small handful of good ones. Hendrik also reviews the tools that he uses to make mortise and tenon joinery, including drill press with mortising attachment, mortising machine, tenoning jig for a table saw, bandsaw and hand tools for final fitting.
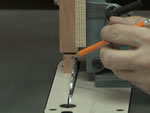
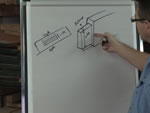
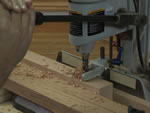
Chapter 2 covers how to plan a mortise and tenon joint, decide on the dimensions and mark it out. Then three chapters cover the cutting of mortises using a mortising attachment on a drill press and using a mortising machine, including how to clean up the mortises with chisels. Hendrik explains that while the machinery might get you 95% of the way there, some well executed hand work is still required. While demonstrating with the mortising attachment and mortising machine, he goes over all of the critical set-up steps and shows how he has improved on some of the deficiencies of the equipment to achieve far nicer results than you would otherwise experience.
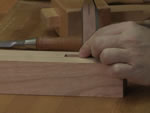
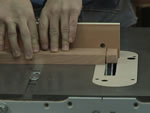
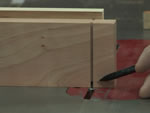
Another chapter covers cutting tenon shoulders on the table saw, with the usual level of detail on accurate set-up. Then two more chapters cover cutting tenon face cheeks and edge cheeks using a tenoning jig. Hendrik covers the painstaking procedure he uses to ensure the tenon ends up just shy of fitting the mortise so that final fitting can be done by hand. Having said that, the tenoning procedure is super accurate and Hendrik is able to dial in a precise result. However, he explains how blade flex can leave a slightly angled tenon face, especially with larger tenons. So his solution is to stop shy of a final fit and use hand tools from there.
A separate chapter covers another method for cutting tenons on a table saw but this time using a dado set with the parts sitting flat on the table saw top. Hendrik explains that he uses this procedure for parts that are too long to stand on end with a tenoning jig. The techniques for achieving accuracy are similar, dialing in the blade height carefully and using a dial caliper to measure progress.
For those who prefer a bandsaw approach, Hendrik also devotes a chapter to making cheek cuts with a bandsaw. He explains why he still prefers the table saw, especially for shoulder cuts, but some might prefer the safety of a bandsaw or might have a table saw that is not up to the finest of work.
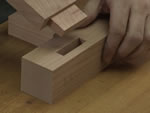
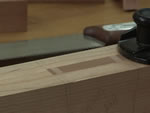
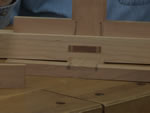
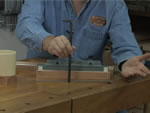
After cutting several mortise and tenon joints, Hendrik devotes a very long chapter (longer than most entire DVD productions!) to the final fitting of the tenons to their mortises. He shows how to fine tune the tenons using an ordinary block plane and chisels for those who do not own a good shoulder plane. And then he shows why a shoulder plane is even better. Best of all, Hendrik doesn’t just do the work but explains his approach and thinking along the way. You have to know where the joint is tight, where to trim and how much trimming is enough. Hendrik shows you how to test fit the joinery as he works on it and then he closes a joint with a snug, piston-like fit. He explains that the proper fit means a joint that can be closed by hand, although it can sometimes be quite a struggle. Removing the tenoned part from the mortise, if they fit well, is generally more difficult and requires a mallet. The chapter ends with demonstrations of mortise and tenon glue-ups done in real time, showing you where to put the glue, how much glue to use, where to place your clamps and so on. Hendrik doesn’t leave out any detail.
As in all of Hendrik’s DVDs, this production is full of techniques he has been using and perfecting for nearly two decades. There is always a wonderful mix of theory, with sketches and full explanations, married with real-time demonstations you can duplicate in your own workshop. This is the beauty of these multiple disk courses, which give you an absolutely enormous level of detail, but in a “live demonstration” format just not possible in a woodworking book or magazine article.
The most important aspect of this production, as with all the others, is Hendrik’s full demonstrations done in real time. He doesn’t assume prior knowledge, so even a beginner will be able to follow along the journey. Yet he has a knack for covering the basics while simultaneously delving into super fine points an amateur is unlikely to even consider for many years. Hendrik has always said that hand tools have a far steeper learning curve than machinery. However, when using machinery to cut joinery, painstaking accuracy is also required. The incredibly valuable lesson in all this is that Hendrik never just touches on the basics, but goes deeper, giving you a level of understanding of how to dial in accuracy on that last one one-thousandth of an inch. In fine furniture work, accuracy and detail is everything.
This DVD set , as in previous productions, demonstrates Hendrik’s approach to the balance between machinery and hand tools. He uses the machinery to the highest level of precision possible, but still recognizes that a machine is no match for the accuracy of a hand tool in the right hands. After the machine has done its best, Hendrik uses chisels and hand planes to perfect the fit of the joinery, making for a rock solid connection.
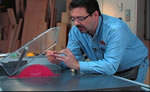
Hendrik is known for his extremely long and detailed “bonus footage” sections in his instructional DVD courses and this DVD is no exception. The bonus footage is called “Sharpening Hollow Chisels and Through Wedged Mortise and Tenon Joints”. Realizing that even a well tuned mortising machine or mortising attachment are useless without proper tooling, Hendrik shows you how to distinguish between high and low quality hollow chisel and bit combinations. Even the higher quality bits need to be sharpened often, so he takes you through the sharpening of the chisel using a diamond cone sharpener and waterstones. He also shows you how to sharpen the auger bit with a fine auger bit file.
In a second bonus footage chapter, Hendrik takes you through one through wedged mortise and tenon joint. This is an absolutely massive chapter at over 2 ¼ hours in length. However, Hendrik wanted to demonstrate a more advanced form of the joint for you to aspire to. Not only does it result in a stunning final result, but it teaches you further skills along the way. He shows you how to cut kerfs into the tenon, hand chisel angled end walls on the mortise and make wedges of the correct angle with contrasting wood. Then he pulls it all together in one final glue-up, complete with tapping in the wedges and removing excess glue. After the glue dries, Hendrik also cuts off the excess through tenon and wedges with a kugihiki saw and then hand planes the surface dead flush. A bit of mineral spirits on the surface shows you the final result, which looks beautiful but deceivingly simple. Hendrik even shows you other joints made in the same way but then cut apart so you can understand how it works inside. Essentially, this method turns a mortise and tenon joint into a dovetail joint, flaring the edge cheeks out with the contrasting wedges. This joinery is both beautiful and bullet proof at the same time.
In short, “Mortise and Tenon Joinery” is the most complete DVD course of its kind on this subject matter. You’ll appreciate the depth of the information and the subtle details fleshed out at every opportunity.
In this must-have video, you will learn:
- why using hollow chisel and bit combinations are Hendrik’s preferred method for cutting mortises, as opposed to router bits and forstner bits
- how to plan mortise and tenon joints, decide on the best dimensions and mark them out
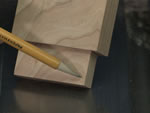
- different marking methods from using a simple pencil and square to using a marking gauge
- how to properly set up a mortising attachment on a drill press and work around any minor manufacturing errors
- the proper order of steps to machine cut mortises with the highest accuracy possible, requiring only minimal clean up by hand
- about the improvements you can make to a mortising machine and how to set it up precisely
- how to use chisels for final clean up of machine cut mortises
- how to cut tenon shoulders on the table saw with extreme precision
- how to use a tenoning jig on a table saw to cut both face cheeks and edge cheeks
- about an alternative table saw technique to cut tenon cheeks on long parts without a tenoning jig (works on short parts too if you prefer)
- how to use a band saw for cheek cuts if you prefer
- how to use hand planes and chisels to fine tune the fit of tenons into their mortises
- how to effectively use a shoulder plane to cut tenon cheeks
- how to glue up mortise and tenon joints and know when the fit is right
- how to sharpen hollow chisel and bit combinations so that they are up to the task of cutting mortises accurately
- how to plan and execute a through wedged mortise and tenon joint, complete with gluing and final trimming
As always, Hendrik’s DVD courses are not like the usual 45 to 60 minute production you may have found disappointing in the past. Hendrik takes you through every procedure in real time, ensuring that you fully understand the thinking behind every step. Most woodworking videos and television shows just show you the “gist” of each technique, editing away the finer details and problems that might arise. If you truly wish to elevate your mortise and tenon techniques to a professional level, the details are everything.
Normally, Hendrik can only cover all of the high-level details he loves to teach in person, but he has once again succeeded at giving you personal coaching in a DVD format. As a 5-DVD boxed set running for nearly 11 hours, “Mortise and Tenon Joinery” will be the leading instructional woodworking DVD in this area. As the trademarked name says, this is “Private Woodworking Instruction in a Box” and nothing short of Hendrik’s in-shop seminars and courses even comes close.
To order your DVD today, click below.
Safety Discussion
Chapter 1
Methods and Tools
Chapter 2
Planning the Joint
& Marking Out Mortises
Chapter 4
Cutting Mortises with
a Mortising Machine
Chapter 6
Cutting Tenon Shoulders
on the Table Saw
Chapter 8
Cutting Edge Cheeks
with a Tenoning Jig
Chapter 10
Using a Bandsaw
for Cheek Cuts
Chapter 12
Sharpening a Hollow
Chisel and Bit
Thoughts on
Woodworking
Part 1
Machines Need to be Tuned
Thoughts on
Woodworking
Part 3
Pride in Workmanship